Saturday, December 31, 2011

LOTV, Belles & Whistles and Tina Wenke Baby girls

  Hello fellow bloggers and crafters, thought it was about time to dust off the blog, after have a few relaxing days over Christmas, and share some cards today, all baby girl ones with LOTS of pink!
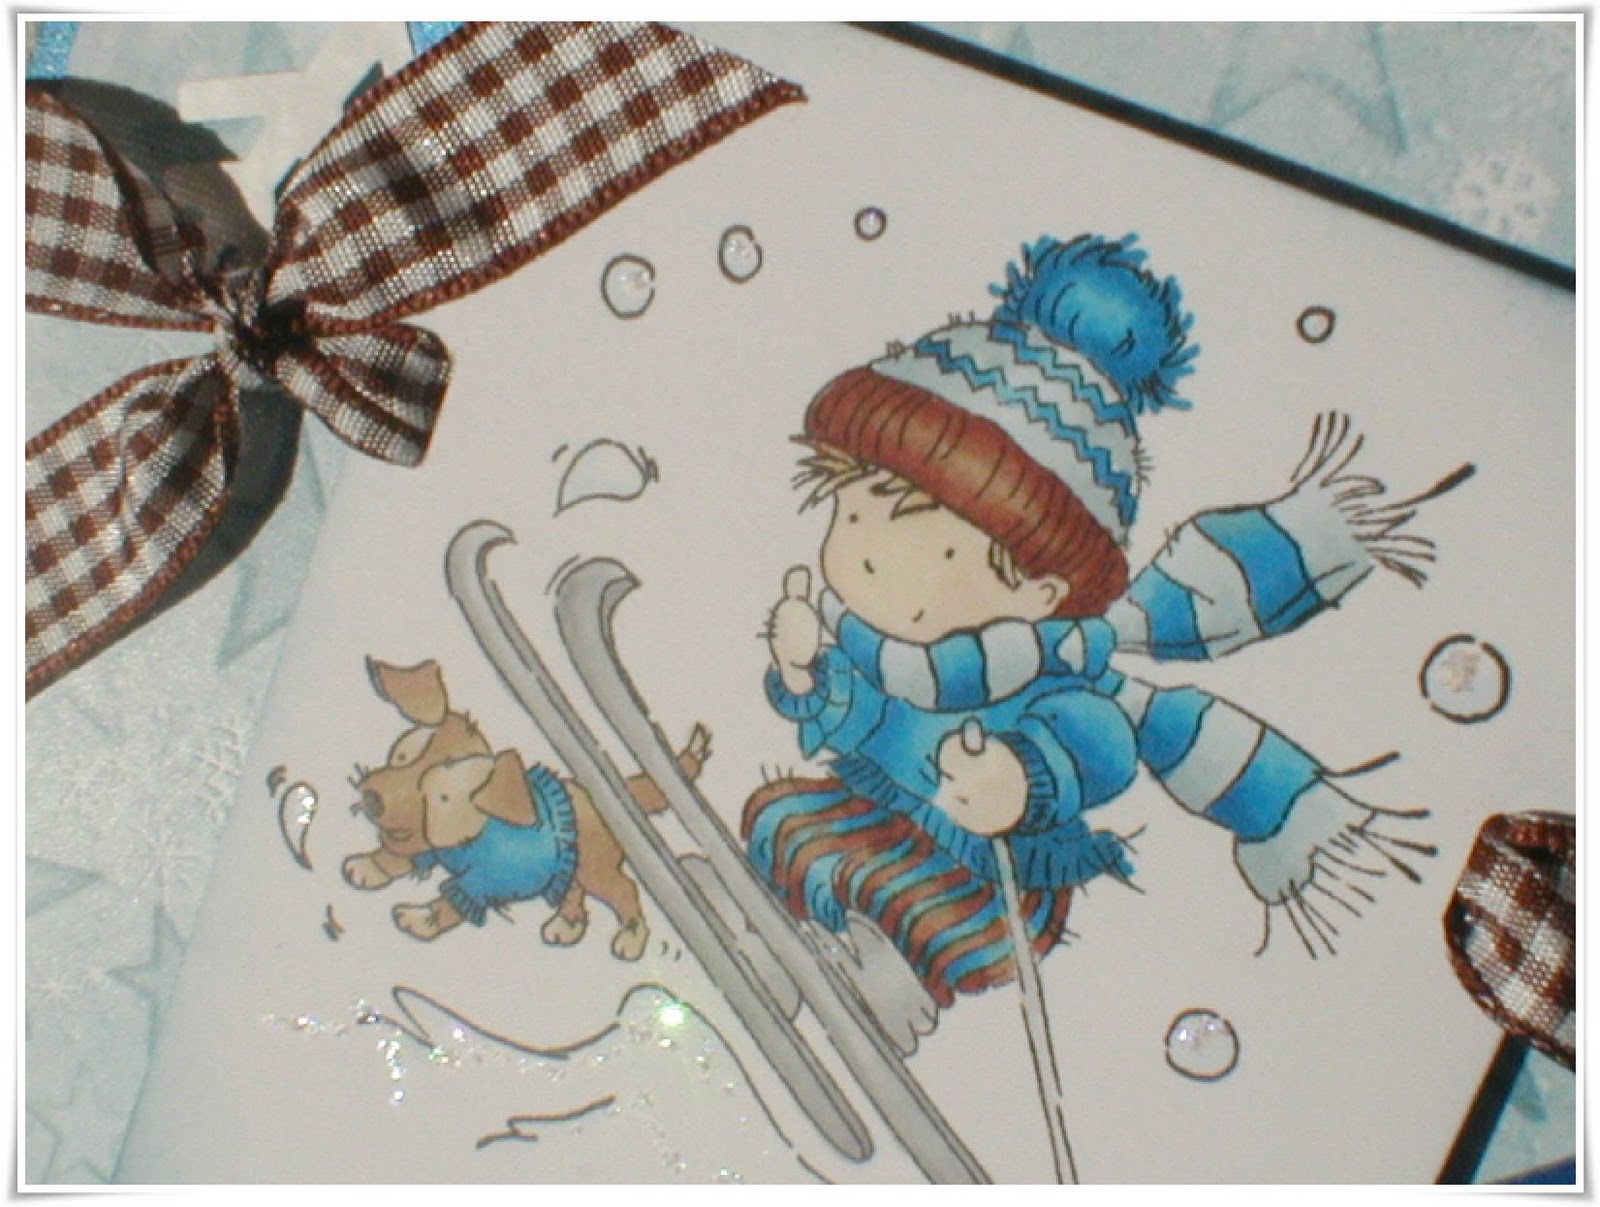
The first one is a LOTV one I have used quite a bit before and is nice and quick to colour and a good size for lots of card layouts.
An aperture and lots of use of nestabilities as well as a Martha Stewart border corner punch.
The colouring is with twinkling H2O's.


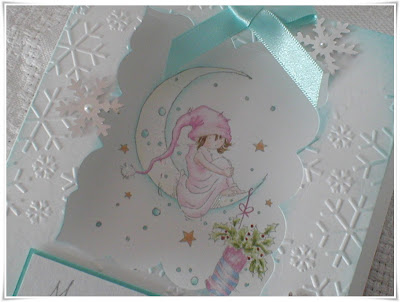
The next card is made with Belles and Whistles stamp called Sweet Dreams, and I used:
Martha Stewart corner punch
cuttlebug embossing folder
nestabilities from spellbinders
magnolia doo hickey leaf dies
EK success flower punches
distress ink
charm
coloured with twinkling H2O's again

...and the last one is one of my favourite baby stamps from Tina Wenke, and for this one I used:
baby feet punch you can find here, and I think dovecraft make a similar one
nestabilities, including lacy ovals
buttons
twinkling H2O's for colouring


that's all for today - I guess it will be 2012 when I post again :)
Happy New Year everyone


Save and bookmark

Friday, December 30, 2011

Lili of the Valley Challenge Blog candy

some candy up for grabs by clicking on the picture link or here - add you link while you still have time and take a peek at the new challenge blog starting 5th Jan 2012..

Saturday, December 24, 2011

Christmas Angels

Well its Christmas Eve and I cant believe - where the year has gone. I am sharing a card made with an image I love, as it evokes the spirit of Christmas for me and angels are very special.
The Stamp is called Angel Crib from Lili of the Valley, its an older one which I love to use every year and so I want to make a simple card with lots of white.


here is the card, and I left a lot of the card blank uncovered, so there was lots of hammered white texture...

  
 and some close up photos of the embossing using Snowflakes 2 (Cuttlebug folder) and white acrylic paint for the edges...


The sentiment is from Lili of the Valley too and I embossed it with white WOW embossing powder in white onto the gold pearlescent card.

that's all for today - I cant wait for tomorrow :)


Friday, December 23, 2011

LOTV Carol Singing and some Facebook news

      Its nearly time for the man in the big red suit to arrive, so hope everyone is nearly ready for Christmas.
The ham is cooking and the smell with the cloves is yummy, and the turkey won't be far behind:)

So on to today's post - have a special card to share, and its made with a Lili of the Valley stamp of course!
It's an easel card which I boxed since the flower, berries and leaves are nice and dimensional.
the picture below shows the card closed.


Here is what was used and some close - up photo's to follow as well:
Lili of the Valley Stamp called Carol Singing
Craft Creations 12 x12 paper called Christmas Carols on Cream SR184P
Craft Creations 12 x 12 paper called Christmas Scrolls Cream SR103P
Berries from Wild Orchid Crafts
Off White 25mm Roses from Wild Orchid Crafts
Leaves punched with Martha Stewart Pine branch punch
Nestability Lables 23
Nestability Shapeabilities Fleur de Lis Doily Accents
Twinklinn H2O's
Glamour dust
Bell Charms from Ebay (check out my Retail therapy page for charm sellers on ebay)


..the chocolate brown satin ribbon has a really luxurious feel..


the corners of the paper were distressed with corduroy brown TH distress ink


and a good old fashioned sentiment added.. the deep red oval is cut on a the fold so that it can be opened and a message written inside..


Here is how the card looks standing up in the box as an easel:


I have also decided to take the plunge and set up a facebook page HERE.
You can click on the link just above, or 'like' the page by clicking on the FaceBook like box at the top left of my Home blog page.
I will be adding cards and other crafty items for sale over the coming months to a nbew page and on facebook.

Wednesday, December 14, 2011

Meljen's 'Green' Challenge #88 and a card share

Just want to share another card using one of Meljen's digi images which you can find HERE, for a little girl celebrating a December birthday and who loves ballet.
I have entered this into Meljen's Challenge blog, and the challenge is to use green


I used promarkers to colour this ballerina and the flowers are made with EK Success daisy punches.
The ovals are cut with spellbinders nestability dies and the ribbon is from stash which I have had for ages....
the papers are from Bearly Mine, the set is called Spring Blossoms and you can find it here.
Oops I nearly forgot - the yellow dew drops are glue gun drops which I made and coloured with lemonade shade of alcohol ink (okay might need to check the bottle!)


...a close-up of the colouring above, and the inside of the card below..

And..........
you might also remember anothjer Meljen's card I did a while back here.... well I am delighted to say it was good enough to be posted on the Melissa's website as a card share - woohoo thanks Melissa, glad you liked it!


Saturday, December 10, 2011

Emma the Caroler from Fred She Said

A very quick post today as flying by and trying to finish some other bits n pieces.. this time of year flies away as 25th approaches!
The next card is a pre coloured digi (you can also get it in black white to colour in yourself, here) and the image is from Fred She Said, with Emma the Caroler in different colour outfits.


For this card I used only two layers, the base full picture and then the second layer is the Emma Image and birds cut out. there is a lot going on so didn't want to add loads of layers, this is nice just as it is.
the papers are from Bearly Mine and the pack is called Christmas Delight which you can find on the Bearly Mine Blog.
The punch used is a fiskars border corner one.


...some close- up photos of the layers, snowflakes and my own dew drops made with a glue gun - these ones are clear as they come out of the glue sticks, no colour was added this time...

Friday, December 9, 2011

Stampavie Penny Johnson's Dearest Deer

Christmas time wouldnt be the same without reindeer, and I really loved this stamp when I first saw it.  We made this card in a recent workshop and I made two samples one coloured with pencils and one with pro markers.

The first sample coloured with pro markers and here are the colours used:

·         Ground - Antique White, Glacier Blue
·         Red Bow - Baby Pink, Carmine, Red, Berry Red, Cardinal Red, Blender
·         Blue Collar - Glacier Blue,  Sky Blue, Cyan, Aegean
·         Bells - Gold
·         Mistletoe - Warm Grey 1, Mint Green, Emerald, Lush Green
·         Antlers - Warm Grey 1, Warm Grey 2, Warm Grey 3, Warm Grey 5, Umber
·         Reindeer 1 - Raw Siena, Terracotta, Ivory
·         Reindeer 2 - Ivory, Tan, Cinnamon, Burnt Siena, Tail - Ivory & Sandstone


and some close ups of the embossing and colouring...


Here is the second sample coloured with pencils and painted with white acrylic paint on the edges - another sunny picture :)

Snowflower Box 2011

.. and that's what I call this little favour / gift box, a cross between a snowflake and a flower.  Had the template for this box a while, can't remember where I found the measurements, but its a normal size rectangle box with a lid which opens on the top, so easy enough to make up..
This is what is looks like completed - we had loads of fun making this last Saturday in the workshop and if anyone makes any more with different colours please let me know and I can post your work and examples here, if you want to share..


For the decoration I used:
Spellbinders Snowflake die, 
EK success Flower punch, 
Quickutz snowflake 12'' die cut down to only use three of the flakes on the die, 
ribbon 
Magnolia Doo Hickey leaf die
and a simple punched border,
..oh and one pearl with a bit of white acrylic paint (there's a pattern forming here!)

 a close - up of the front of the box...


big enough to fit some home made chocolates (Charmaine!!..........) or some little bath fizzers or any other homemade gifts you might fancy and want to make for someone special!

Will be back with another Lily of the Valley easel card using flowers and berries when I have taken the photos..

Thursday, December 8, 2011

Pink and Green Snowy Village

Wanted to try a different colour scheme with this Christmas card, so have gone for pink and green (well I love the olive and pink colour combination and have used it before) and wanted to try this for christmas with a paler green. 
Used the acrylic paint on this again (so much more white and dimensional than even white stazon or pigment inks!)


.... eek the card looks like it isnt level... oops sorry about that!! anyway here is a closeup of the embossing. everyone asks me about this cuttlebug folder - its called Snowflakes 2 and hard to come by, so if you see it, GET IT and tell us where you found it....


The stamp is an old old one from ebay and is made by Anita's will see if the sticker is on it and put up the name later on. The sentiment is from Lili of the Valley Circular Christmas sentiments in polymer

Wednesday, December 7, 2011

Magical Christmas with Lili of the Valley Moonlight Wishes

Hi bloggers, am back with ........surprise........... another Lili of the Valley stamped card!!
 Really really adore this stamp too LOL, so I made an aperture card which folds flat but springs back when you take it out of its box or envelope (yes it does fit in the envelope).


You can find the stamp here, and have added some photos below to show the layers / aperture and how the tag fits in behind the image.


...yep a nice sunny photos on this one too which really shows off the mica in the twinkling H2O paints (looking for a stockist as we speak, for those who have been asking about purchasing their own and I have a suggested list of 36 colours prepared too)


the card onto which the image is stamped is mounted with foam pads onto the backing card, with foam pads placed around the area you want the tag to fit and here is how the tag pops out:


and another view of the embossing and distressing using tumbled glass distress ink


think I will be making a few more of these cards.. so will be doing another workshop one like this very soon

Tuesday, December 6, 2011

Winter Wedding

I love making winter wedding cards, with lots of white and sparkle.  This one is quite religious and so I didn't want to use an image or dress it up too much, but the punched layers and die cut apertures with soft colours and shapes make it nice and delicate.


Punches used are PATP Martha Stewart punches you can find details of here and find in qute a few craft outlets.
Below are some closeup photos showing layers and other elements -
the leaf die is a Magnolia Doo Hickey Die called Bon Voyage Foliage  and the flowers are the EK success retro flowers which come in 3 or four sizes and have used these before.
After punching the flowers and cutting the leaves I sprayed them with Memory Mist to give them a subtle shine.


The card looked good in a box which I decorated very simply on the outside using the same shapes and ribbon...

Monday, December 5, 2011

Craft Creations Die Cut decoupage Snowman

Just a quick one to share - another easel card using Die Cut decoupage from Craft Creations which you can find here.

 
Added some white pearls (which I made into red berries using a pro marker), some ek success punched swirls and a Martha Stewart Holly corner punch.  
After punching out the square main layer of the sheet, I added stickles all round the edge to make the border sparkle.
A little closeup view of the red berries..

Nativity and some other Christmas cards

Another few more to share using stamped images again..
The first is a nativity Stamp from Inkadinkadoo, details you can find here.
For this card I used Craft Creations papers - Christmas carols Cream SR184P -  and a sentiment stamped & embossed in gold and used the nestability dies to stencil using brushed corduroy distress ink; with gold coloured glue dots to finish.


 Have added a photos to show some detail in the papers, ribbon and inking / stencilling... and I never coloured the stamp because it looked understated and 'complete' when I just used memento rich cocoa on the image, so nothing more was added.


The next card didn't photograph so well as the colouring on the angel was very subtle using twinkling H2O's and a bit of glitter was added, but it does sparkle a little without the need to add stickles or any glitter glue. I loved these papers from Craft Cations too - also in 12 x 12 - use the link above and the code is SR104P Christmas Holly Cream


The last card to share in this post is a Flourishes Stamp set I bought last year and love using  and am sure will use again next year!!  The doves are beautiful and I used this detailed stamp to demo the soft colouring effect you can get with artist quality pencil crayons.. I didn't get around to using the sansodor and blending stumps as it was nice just using the pencils on their own.


The papers on the doves and holly card can be found on Bearly Mine designs and are freebies from last year.

Sunday, December 4, 2011

Boy's Christmas card

Have sorted out the photos of all cards and makes from last few weeks, including workshop ones, as the light has been bad and I had not had a chance to blog for a little while, so next few days posts are all a catch up, and its lot of work to add in all the links so bear with me!

First card to share today is a Lili of the Valley one - I made two, one coloured with pro markers and one with twinkling H2O's in case you're wondering why they look slightly different!!

You can find the stamp here and its called Ski Jump.
the image below has been coloured with twinkling H2O's and stickles, with distressing using a distressing tool and Tim Holtz Faded Jeans distress ink.
The punches are two EK Success ones which I got on eBay if I remember, cant find them on the ebay website together now but you can buy the separately, and here is a link to EK success - they are called Starry night.
The large snowflake is also an EK success punch, and the flake measures approx 2.5 inches.

The papers on the card are from Bearly Mine Designs pack called Winter Swirls which you can find here.

below is a closeup of the colouring using pro markers and the list of colours are:
·         Skis - Ice Grey 1,2,3,4
·         Ski Pole - Ice Grey 1
·         Skin and Hands - Ivory, Satin, Blush
·         Dog - Satin, Sandstone, Caramel, Cinnamon
·         Scarf and Hat - Blender, Glacier Blue, Pastel Blue, Denim Blue, Sky Blue, Azure, True Blue, French Navy
·         Hat & Trousers - Sandstone, Cinnamon, Henna , Burnt Umber
·         Hair - Ivory, Vanilla, Sandstone
·         Top & Trousers - Blender, Glacier Blue, Pastel Blue, Denim Blue, Sky Blue, Azure, True Blue, French Navy

.. and the card displayed as an easel shape: (it was very sunny when I took this picture!)


Right ... off to sort out some more photo's and links - happy Christmas card making, I still have lots more to make!

Saturday, December 3, 2011

Forever Friends Red 'n Green Christmas

It's time to dig out a neglected stamp, and I still love forever friends images, so decided to make a nice slim Christmas card in traditional red and green colour combo.  The papers are from Bearly Mine again and this one is from a set called Christmas Joy which you can find here.


The sentiment is computer generated and the snowflakes are cuttlebug die ones which you can find here. The red gems are actually clear gem stones which I coloured with promarkers (so that works on pearls and gems - its amazing how the simplest things impress me sometimes!!), and the omage is coloured with polychromos pencils and blended with sansodor and blending stumps.

      04/12/ Edited to add - 
          Here is a promarker coloured version with suggested colours:
·         Jacket - Baby Pink, Carmine, Red, Berry Red, Cardinal Red, Blender
·         Mittens and Robin - Blossom, Forest Green, Pine, Holly, Blender
·         Bear body - Antique white, Satin, Sandstone, Caramel
·         Robin - Satin, Cinnamon, Cocoa, Peach
·         Mug - Ice Grey 1 2 3 4 Blender